Ingredients
13 oz. bread flour (Red Mill preferred)
6 oz. whole wheat flour (Red Mill preferred)
1.5 oz. gluten flour (Red Mill preferred)
.7 oz. Kosher salt
1 tsp. active dry yeast
13.5 oz. cold water
6 oz. sourdough starter
Directions
1. Place the dry ingredients in the bowl of a stand mixer with a dough hook.
Note: I use a two-cup measure with extra space at the top and a culinary scale to measure the dry ingredients.
2. Use the dough hook and a spatula to mix the dry ingredients.
3. Pour the water into the measuring cup and zero out the scale.
Note: Do not use more than 13.5 oz. of water. You want a fairly dry dough. If you use too much water the dough will not rise properly and the top will collapse into “cat ears” while baking (the top in a deep “V” shape down the length of the loaf).
4. Add the sourdough starter to the water and stir them together.
5. Add the water mixture to the dry ingredients and mix with the bread hook on low.
Note: Use a spatula to scrape the bits of flour and dough clinging to the sides of the bowl.
6. When most of the dry ingredients have been absorbed, raise the mixing level to medium low.
7. Knead the dough with the dough hook for 5 minutes.
Note: I have a marble pastry board which I use to hand knead the dough.
8. Dust the board with flour and hand knead the dough for an addition 4-5 minutes.
Note: I usually work about another ¼ cup of flour into the dough while I knead.
9. Form the dough into ball and place it back into the mixing bowl.
Note: I clean the bowl after I have kneaded the dough.
10. Cover the bowl with plastic wrap and place it into a slightly warmed oven.
Note: I place a large rubber band to keep the plastic wrap sealed.
11. Let the dough proof for 2 hours, until the dough ball has doubled in size.
12. Dust the bread board and scrape the dough onto the board and flatten it into a square.
13. Sprits the top of the dough to dampen it.
14. Starting at the near edge roll up the dough into a cylinder (5-7 turns).
15. Pinch the seam all along the dough cylinder.
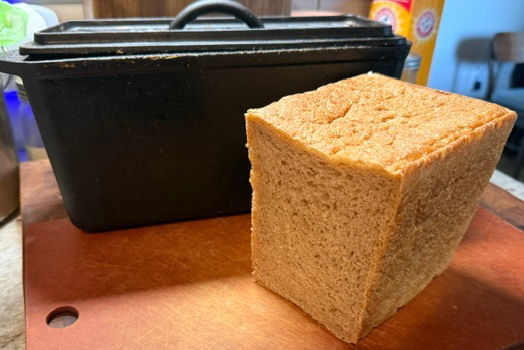
Note: I have a cast-iron loaf pan with a heavy lid. I cut some parchment paper to the size of the bottom of the pan. I then rub vegetable oil on the sides and lid of the pan.
16. Place the dough into a bread loaf pan with the seam down.
Note: If your pan has a lid, place it on the pan.
17. Set the pan in a slightly warmed oven and let it rise for 3 hours.
Note: If you do not use the yeast, the rising will take much longer 6-7 hours.
18. Check the rise on the dough, if it is within half an inch of the lid, let it rise for another 1-2 hours.
Note: After this point, do not touch the lid. Ideally, the dough will rise all the way to the top, so that when you remove the lid after baking, you have a flat-topped loaf. If you lift the lid before baking, the raw dough may already be in contact with the lid and the dough will collapse.
19. With the bread pan still in the cold oven, set the temperature to 400º F. and bake for 45 minutes.
20. Remove the pan lid and bake for another 5-6 minutes until the top the of bread is well browned.
21. Turn the bread out onto a wire-rack and cool for at least 10-15 minutes before cutting.
 karllueck
 Miriam
