
Adapted from a Mel’s Kitchen Café recipe
Recently, Eilene asked me to make flat bread. My first attempt, with rosemary, came out thick and chewy. It was OK, but not spectacular. I decided to try again only this time rolling the dough thinly and adding chives and lemon time. This was more of what I had in mind.
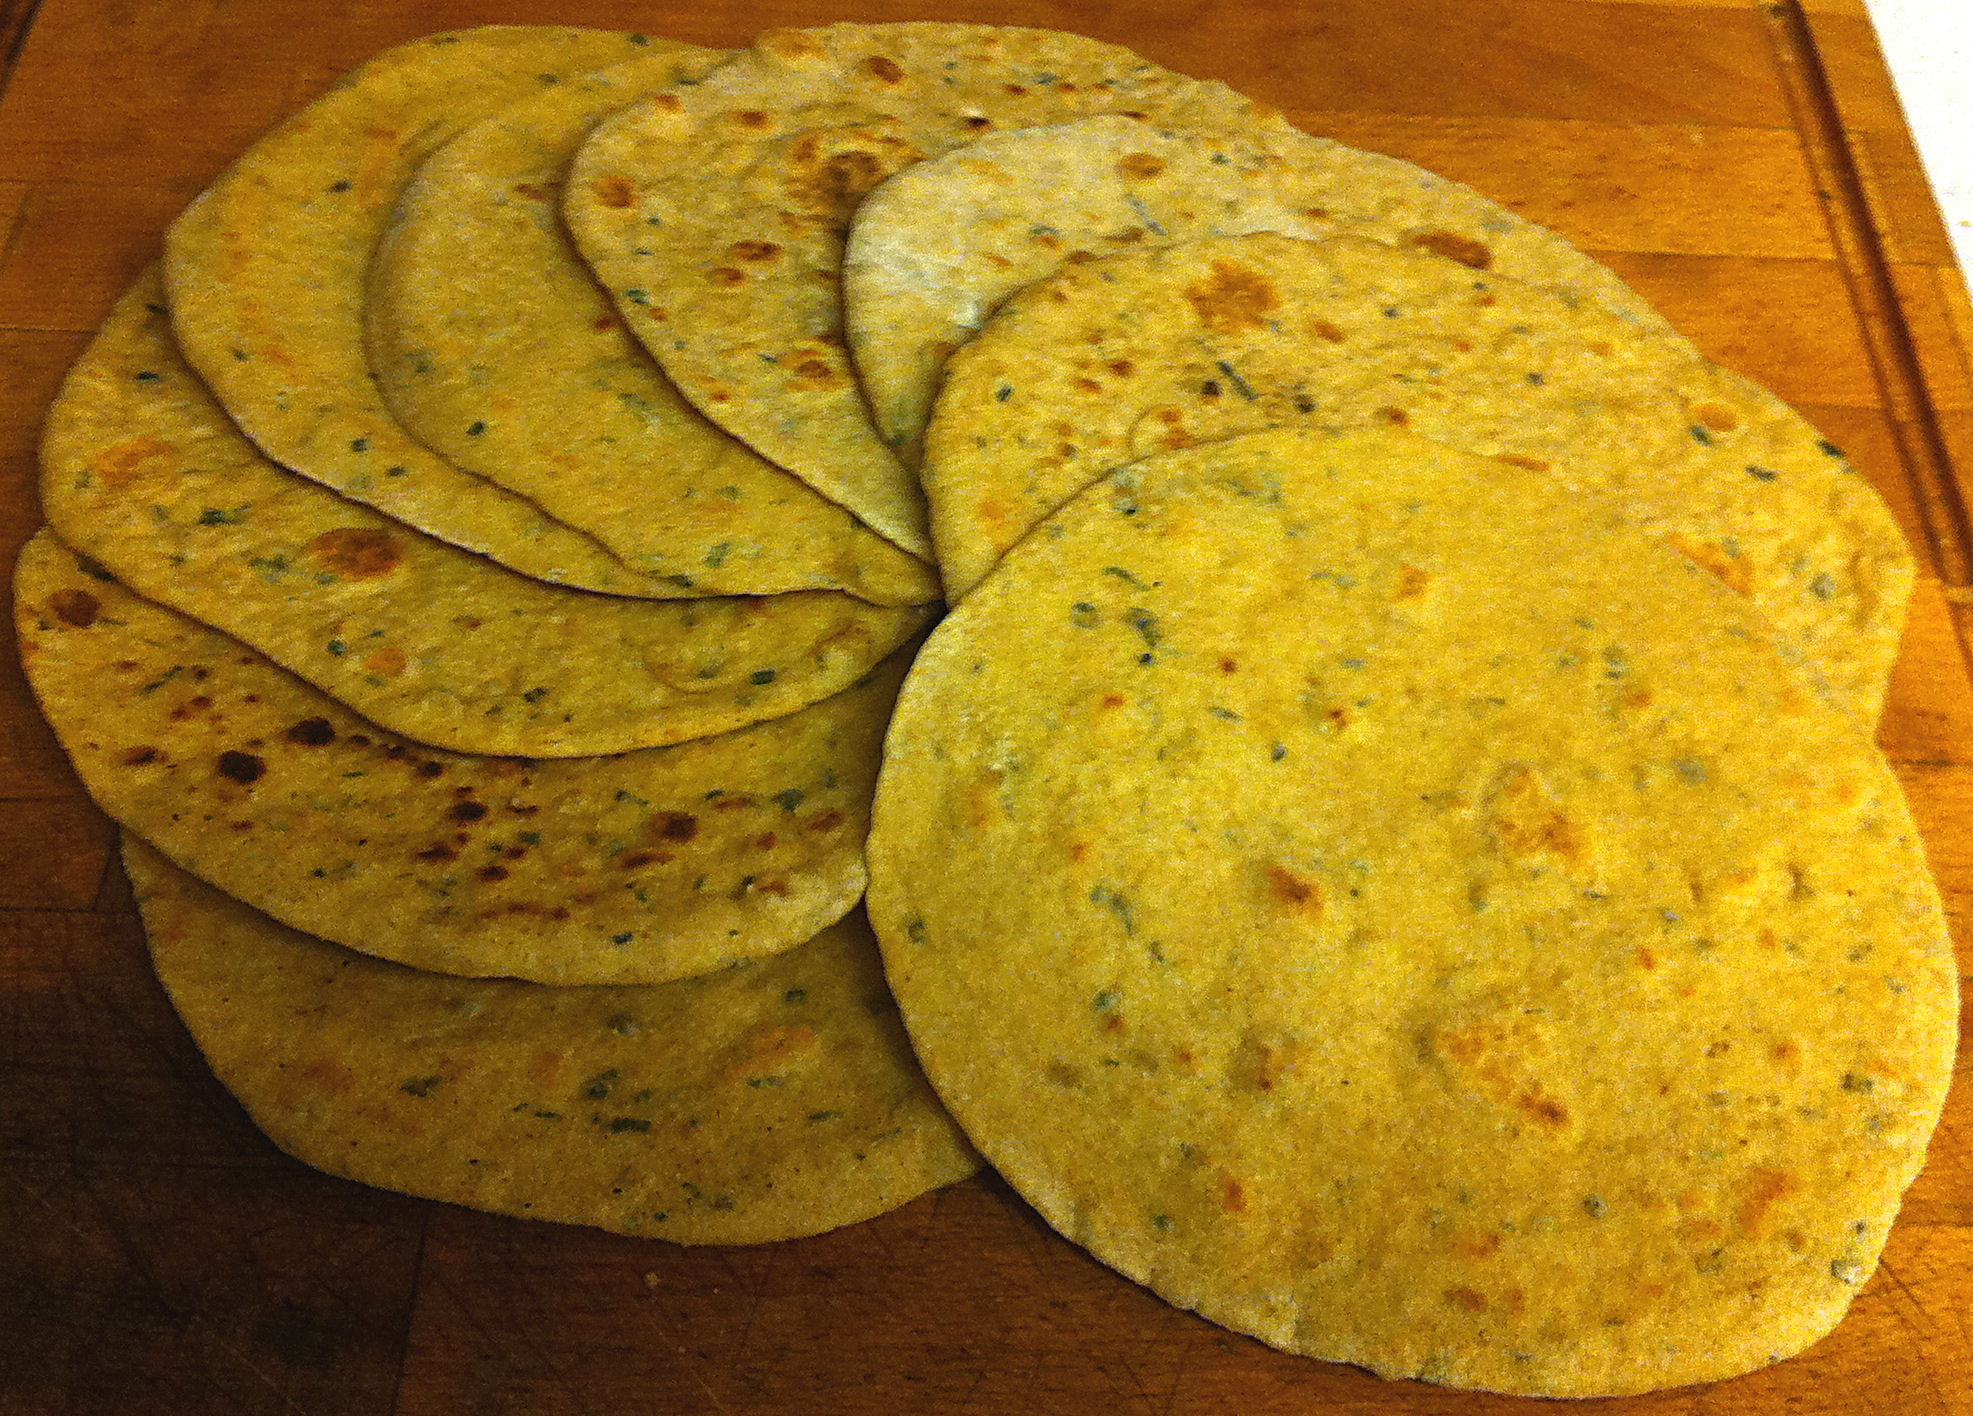
Karl’s Herbed Flatbread
In the last few weeks I have not had a lot of success with my recipes. I made pomegranate jam with too much pectin and scallion pancakes that came out dense instead of flaky. Really nothing good enough to post.
One of the problems of bread making is that many of the things we like to add to bread—like milk, salt, and oil—hinder the formation of gluten, the compound that gives bread its structure. A way to have both structure and flavor is to use what is called the “sponge” method of bread making. The water and yeast are given some time to work their gluten forming magic on the flour, before the other ingredients that interfere with the process are added.
Karl’s Herbed Flatbread
Ingredients
2/3 cup warm water
2 tsp. active dry yeast
1 tsp. sugar
1/2 cup warm milk (lactose free, for Vegan replace with water)
2 cups bread flour, separate uses
1+ Tbs. extra-virgin olive oil, separate uses
3 Tbs. chives, finely chopped
1 tsp. lemon thyme, minced
1 tsp. salt
1 cup whole wheat flour
Directions
1. Put the yeast, sugar and water into a large bowl, stir once and let it rest for 15 minutes.
Tip: The sugar and warm water starts the yeast growing and jump starts the process. If there is not a yeasty foam on top of the water after 15 minutes your yeast has gone bad. Discard and start over with fresh yeast. This is called “proofing” your yeast.
2. Add the milk and 1½ cups of the bread flour to the bowl. Stir in the flour until all of the lumps are gone.
3. Cover the bowl with a damp cloth and let the batter rest for one hour.
Tip: Making the “sponge.”
4. Add the one tablespoon of oil, chives and thyme to the sponge and fold them in gently.
Tip: You want to incorporate these ingredients thoroughly, but you do not want to tear the gluten sheets that have formed in the sponge.
5. Put the salt, the remaining ½ cup of bread flour, and the whole wheat flour in a medium bowl and mix them well.
Tip: I sift the dry ingredients several times to get a good mix.
6. Add half of the flour mix to the bowl and gently fold it into the sponge.
Tip: Again tearing the dough as little as possible.
7. When most of the dry flour has been worked into the dough, turn it out onto a clean flat surface and start kneading the dough.
8. Gradually add half of the remaining flour in until a soft dough is formed. Knead the dough for at least five minutes, until it is only slightly sticky.
Tip: The dough ball may seem a bit grainy and dry as well.
Note: You should have about a quarter cup of dry flour mix left in the bowl.
9. Form the dough into a ball and put it back in the bowl. Cover the bowl with a damp towel and let the dough rest for 15 minutes.
Tip: This rest allows several things to happen at once. The yeast produces water as it grows—as well as the gas that gives yeasted bread its lift. This extra liquid helps moisten the dry dough as it rests. The pause also gives the dry flour time to absorb this moisture and it gives the gluten time to relax, making kneading the dough easier.
10. Scatter half of the remaining flour onto the work surface and knead the dough again for 4-5 minutes, until it is soft and smooth.
11. Pour about a teaspoon of olive oil into the mixing bowl and flip the dough ball over a couple time to lightly oil it on all sides. Cover the bowl with a damp towel and place it in a warm spot to rise until it has doubled in size, about an hour.
Note: At this point you have a choice to make. Do you want thick and chewy naan-like flat bread or a thinner more tortilla-like flat bread? For a thick bread divide your dough into 6-8 pieces. For a thinner bread, divide your dough into 10-12 pieces.
12. Divide the dough into equal pies shaped pieces. push the point of the wedge into the dough and stretch outside over it to form a ball. Twist the edges together to make a tight ball and lay it with the twisted side down.
Tip: The dough has sheets of gluten running through it. When you cut the dough you tear into these sheets. By pulling the uncut edges around the breaks, you keep as much of the gluten’s structure as you can. Dough is like a balloon, if there are tears or breaks the gas that provides the lift in raised bread will leak away.
13. Form the rest of the dough into balls and cover them with a cloth or plastic wrap. Let the dough pieces rest for 10-15 minutes.
Tip: This gives the gluten time to relax and makes the dough easier to roll out.
14. Working with one piece at a time, on floured counter, roll the dough into 7-8 inches in diameter circle.
Tip: About an 1/8-inch thick for the thicker flat breads and about 1/16-inch for the thinner breads.
Note: This is another choice point. Do you cook the bread on a dry pan or in oil? Dry cooking produces a lighter bread, but it may cook unevenly and have some raw flour coating the outside. Oil helps the bread to cook more evenly and completely, but may make the bread a bit greasy. the oil also brings out the flavor of the herbs. It is a matter of personal choice and diet which you prefer. For thicker breads I prefer to use a dry pan. For thinner I brush one side lightly with olive oil before putting it in the pan.
15. Preheat a griddle or skillet to medium heat, about 300º F.
Note: Preheating the pan and the correct temperature is very important. Too high and the crust will burn in spots before the center is done. Too low and the bread will dry out and get tough.
16. Cook the flatbread on the first side until it bubbles and puffs. Flip it over and cook on the second side until it is well done with a few spots of dark brown.
Note: 2-3 minutes per side for thick flat bread and 1-2 minutes for thin.
17. While the first bread is cooking roll out the next, so that it is ready when you remove the first from the pan.
18. Transfer the flatbread to a wire-rack and cover with a clean kitchen towel.
Tip: Laying the bread on a flat surface will cause the bottom bread to get slightly damp from the condensed steam.
19. Continue rolling and cooking the remaining dough balls.
20. Stack the finished breads on top of the last and cover with a cloth until all are cooked.
Tip: They are best served immediately, but they may be toasted the next day.
