
Bierock are Volga German stuffed breads. The Volga Germans were brought into Russia by Catharine the Great for their “modern” technical skills. However, their cooking was not one of those skills. Many would consider both German and Russian traditional cuisines a wasteland—there is only so much you can do with cabbage, flour, potatoes and a little beef when you do not have access to, or can afford, fancy spices.
Karl’s Bierock
A bierock is not now, nor has it ever been haute cuisine, it is essentially a workingman’s lunch. When you are working, traveling, or having some kind of festival event, you do not always have time to sit down for meal. Having a meal in a neat, sealed package that you can slip into a pocket or pouch is a solution that many cultures have discovered.
My test for success is Eilene’s friend, who is Volga German. This is a girl who does not eat yellow onions and who has complained before that my food is too spicy for using too much ginger. Her standard is her Oma’s cooking— her Volga German grandma.
I have kept most of the ingredients to the standard traditional recipe. I have added soy sauce and garlic, because I simply had to. Most of my changes have been in technique—small changes to how you handle certain ingredients can make a big difference to their final flavors. Finally, to please Eilene’s friend, I have replaced the usual yellow onions with green onions—which she will eat.
After Dinner Note: A Volga German seal of approval. Even better, she begged to take the leftovers home. Even Jan—who is also part Volga German herself and who has an aversion to German cooking—liked them.
Karl’s Bierock
Ingredients
Dough
½ Tbs. active dry yeast
½ cup warm water
2+ Tbs. sugar, separate uses
3+ cups flour, AP
½ tsp. salt
½ cup milk
1 egg
½ cup butter, melted, separate uses
Filling
1 Tbs. soy sauce
½ tsp. baking soda
2 Tbs. hot water
¾ lb. ground beef (10% fat)
4 cups green cabbage, finely shredded
15 green onions, finely sliced (white and green parts separate)
½ Tbs. Kosher salt
½ Tbs. black pepper, fresh cracked
Directions
1. Put the yeast in the warm water with a good pinch of sugar. Stir and let proof for 10 minutes.
Tip: If your yeast is good there should be a good head of foam covering the mixture after this time. If there is not, discard and buy new yeast.
2. Sift the flour, salt, and two tablespoons of sugar together several times to get an even distribution of the ingredients.
3. Warm the milk slightly and scramble the egg into the milk.
Tip: You do not want the milk hot enough to start cooking the egg, you just do not want it to be cold from the refrigerator.
4. Make a “well” in the flour and add the yeast water, milk/egg mixture and one quarter cup of melted butter.
5. Pull the flour from the sides of the “well” into the wet ingredients.
6. When the flour in the bowl is mostly incorporated, turn the dough out onto a well-floured smooth surface.
Tip: Put about half a cup of flour on the board.
Note: You will be kneading the dough for 15 minutes and in that time you will be constantly adding more flour to prevent the dough from sticking to either your hands or the bread board. Depending on a number of factors—the exact amount of liquid you added, the moisture content of your flour and the humidity—you may end up adding a full cup of flour before you are done.
7. Knead the dough for 15 minutes until the dough is smooth and elastic.
8. Add one tablespoon of melted butter to the bowl you mixed the dough in and rub the top of the dough ball in the butter.
9. Turn the dough over and cover the bowl with a smooth, clean, damp, kitchen towel. Place the bowl in a warm place for one hour.
Tip: If you use a terrycloth towel, the dough might stick to it as it rises and be hard to remove.
10. Mix the soy sauce and baking soda into the hot water and then add it to the raw ground beef.
Tip: The soy sauce adds umami. what your taste buds identify as a meaty flavor. The baking soda acts as a meat tenderizer.
11. Mix well and then let the beef rest for 20 minutes.
12. Add one tablespoon of melted butter to a large pan over medium high heat.
13. Form the beef into a single large patty, about 9 inches by half an inch thick.
Tip: This is a Cook’s Illustrated technique. If you break the meat up in the normal way, you may get some browning, but the meat bits end up tough and grainy. By browning the meat in a patty you get the flavor of well browned meat, but you can break the patty into tender chunks—the best of both worlds.
14. Fry the patty for about ten minutes on one side, until crispy and well browned.
15. Turn the patty over and continue frying until well browned on the second side, about another 6-8 minutes.
16. Remove the meat to a plate to cool.
17. Add the cabbage, white parts of the onion and the salt to the pan.
Tip: Use the moisture released by the vegetables to deglaze the pan.
18. Sauté the cabbage until soft, but not browned, about ten minutes.
Tip: Stir the cabbage frequently, so that it cooks evenly and does not scorch from resting against the hot pan for too long.
19. Pull the vegetables to the edges of the edges of the pan and add the garlic to the hole in the center.
20. Sauté the garlic for one minute, until fragrant.
21. Stir the vegetables into the garlic and turn off the heat.
22. Sprinkle the black pepper over the cabbage mixture
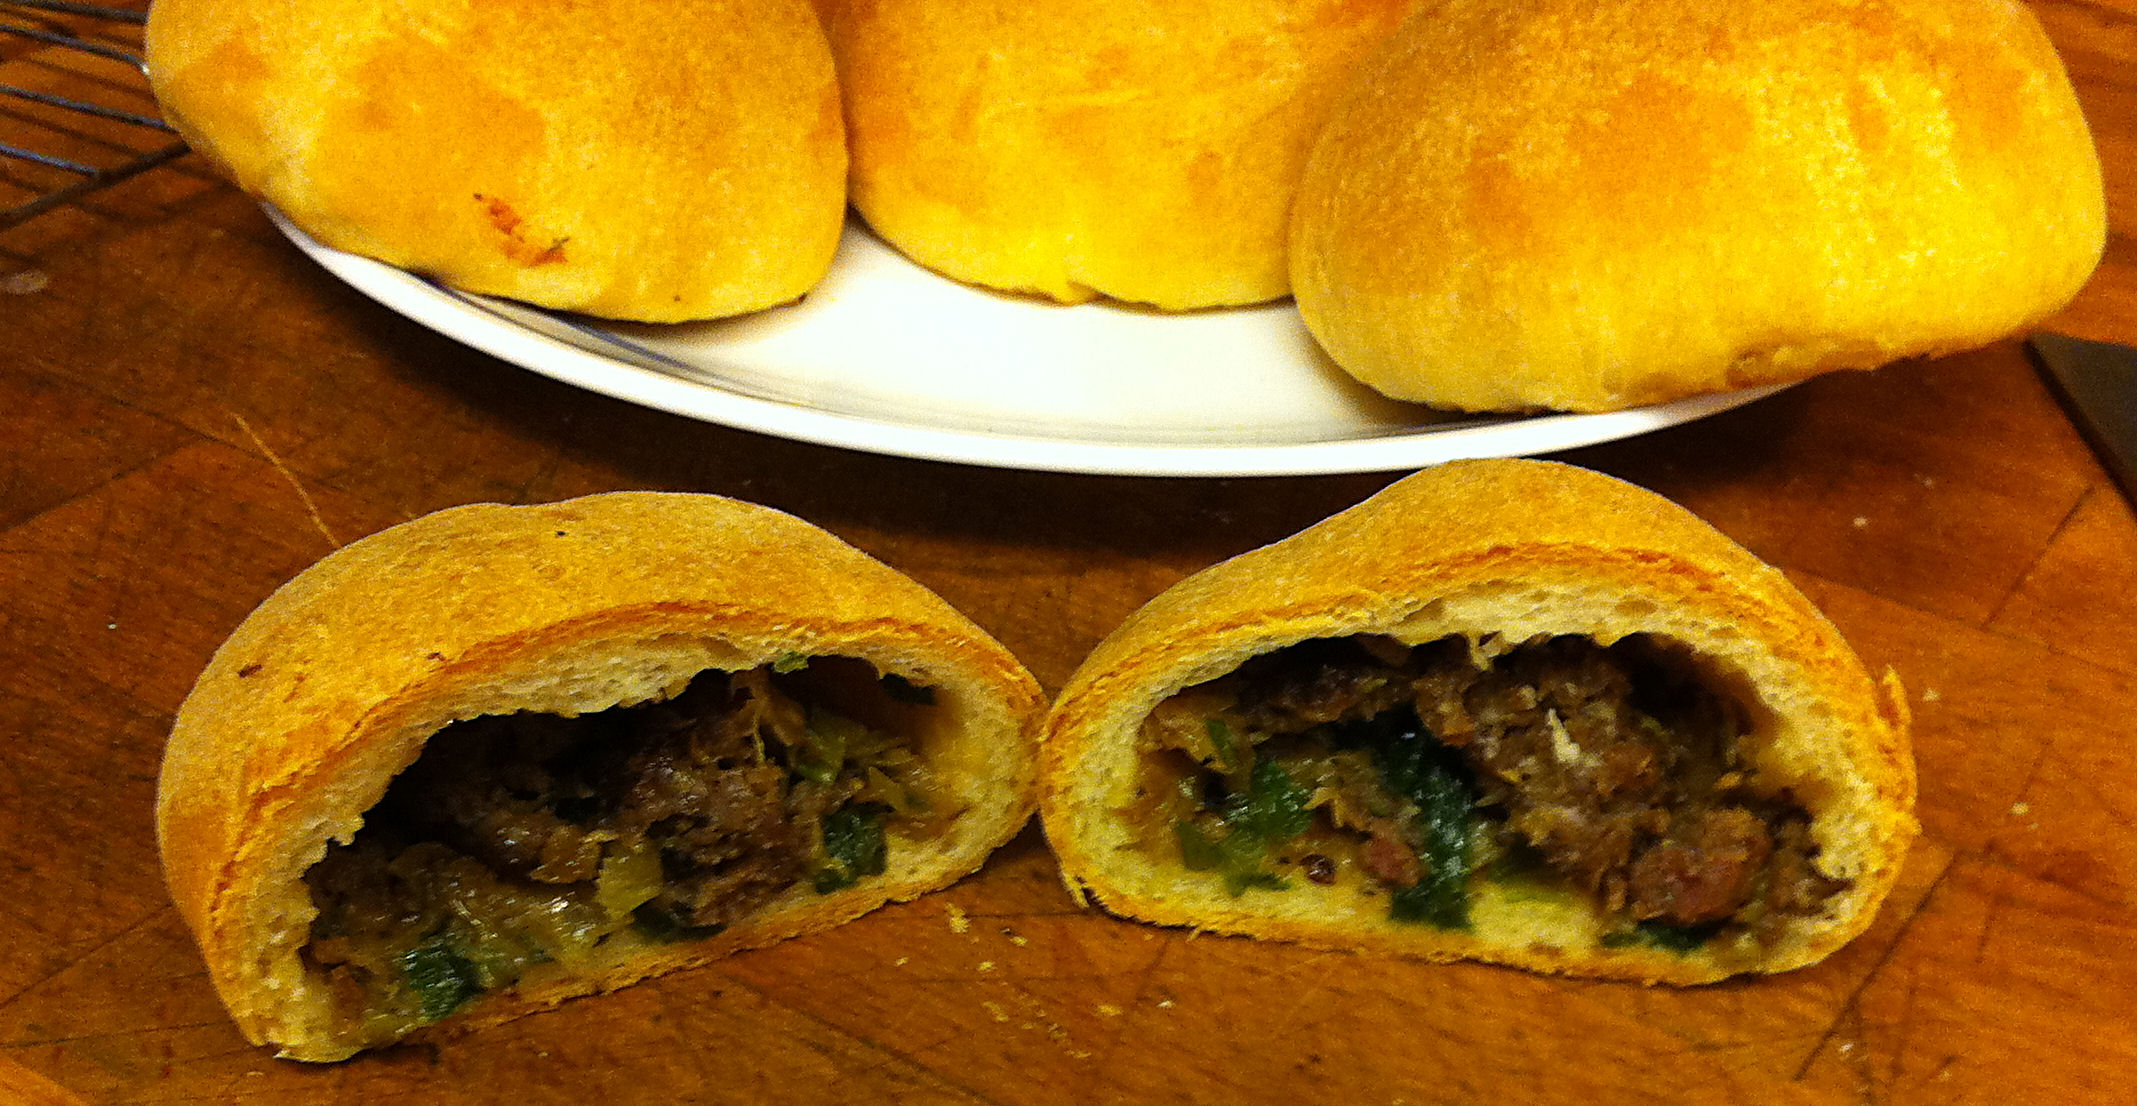
23. Break the beef patty into small bits and stir them into the cabbage mixture.
24. After the mixture has cooled for 10 minutes, stir in the green parts of the onion.
25. Punch down the dough and divide it into portions.
Tip: How many portions you make with your dough is your choice. Dividing the dough into eights (with a half cup of filling) will produce a very large, “full meal,” bierock. Dividing the dough into 16 portions, the more usual division, produces “dinner roll” sized bierock.
26. Divide the dough into 16 portions and pull the sides into to make 16 balls.
Tip: This is a raised dough that depends on gluten sheets for its “lift.” When you cut your dough, there will be an outside surface—smooth—and several “cut” surfaces—covered in bubble holes. Stretch the outside surface around and push the cut sides into the center of the balls. Lay the balls down with the crimped side down.
27. Take a dough ball with the “crimped” side up and stretch it into a disk about 3-4 inches in diameter.
28. Place a quarter cup of filling in the center of the disk and—with your thumbs—press the filling down, while you pull the filling over it with your other fingers.
Tip: Video
29. Lay the finished bierock on a baking sheet covered with parchment paper.
30. Let the bierock rise for 20 minutes.
31. Bake for 30 minutes in a preheated 350º F oven.
Tip: Rotate the tray after 15 minutes so they cook evenly.
32. Transfer to a wire rack for 10 minutes to cool and eat warm or cold.

Pingback: Karl’s Chicken Curry Pasty | Jabberwocky Stew
Pingback: Karl’s Better Bierock | Jabberwocky Stew
Pingback: Karl’s Pocket Tacos | Jabberwocky Stew
Pingback: Karl’s Uyghur Bierocks | Jabberwocky Stew
Pingback: Karl’s Chicken Curry Bierocks | Jabberwocky Stew
Pingback: Karl’s Moroccan Chicken Bierocks | Jabberwocky Stew
Pingback: Karl’s Chicken Florentine Bierock | Jabberwocky Stew